
Hidden from View: Investigating Masonry Veneer Anchorage
Masonry veneer failures rarely give generous warning. When they occur, they are often sudden, localized, and dangerous—especially where veneer is overhead at entrances, sidewalks, or school corridors. The problem? The most critical component of the system—the veneer anchorage—is concealed within the wall cavity.
This article examines how anchored masonry veneer systems work, why they fail, and how non-destructive and destructive testing methods can be combined to evaluate anchor distribution, installation quality, and corrosion before a collapse occurs.
What Is Anchored Masonry Veneer?
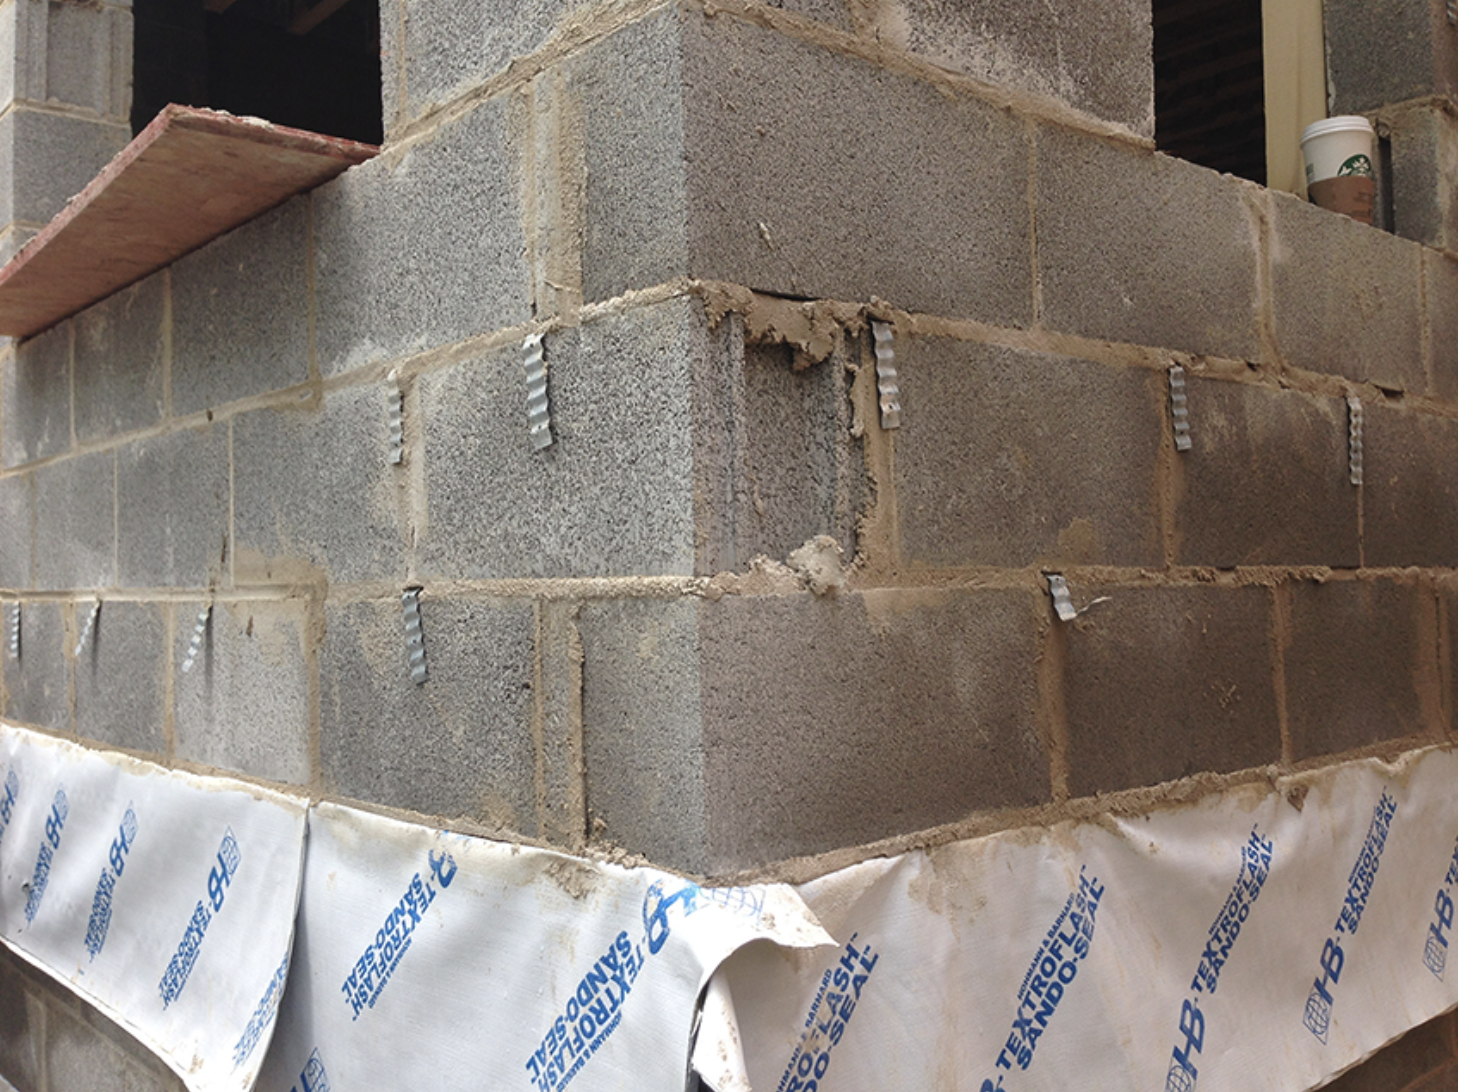
Anchored masonry veneer typically consists of a single wythe of brick, natural stone, or manufactured stone attached to a structural backup wall. In modern cavity wall construction, the assembly includes:
- Exterior masonry veneer
- Drainage cavity (air space)
- Air/moisture barrier
- Exterior sheathing
- Framing (wood, steel, or CMU)
- Interior finishes
The veneer is not structural. It relies on metal anchors (wall ties) to:
- Transfer lateral loads (wind and seismic)
- Stabilize the veneer
- Maintain alignment
- Prevent out-of-plane failure
Common anchor types include unit ties (box ties, Z-ties, corrugated ties), adjustable ties, and joint reinforcement systems.
Code guidance for anchor spacing, embedment, and corrosion protection can be found in:
- International Code Council (International Building Code)
- The Masonry Society (TMS 402/602)
- Brick Industry Association (Technical Notes 44B)
However, code compliance at installation does not guarantee long-term performance.
Why Veneer Anchorage Fails
Failures typically result from one or more of the following:
- Insufficient anchor density
- Improper spacing or irregular distribution
- Anchors fastened to sheathing instead of framing
- Inadequate embedment into mortar joints
- Use of incorrect anchor material (e.g., galvanized instead of stainless steel)
- Corrosion of anchors or fasteners
- Restrained vertical movement (anchors installed incorrectly)
The most serious risk is progressive anchor corrosion inside the cavity—often invisible until the veneer detaches.
Notably, corrosion has been observed even in non-coastal regions and in buildings less than one year old.
Non-Destructive Veneer Anchor Surveys
One of the most effective investigative tools available today is magnetic pulse induction scanning using wall tie locators such as the Protovale® Imp Wall-Tie Locator.
These devices detect embedded metal anchors within mortar joints without removing masonry.
How the Survey Works
- Select accessible wall areas
- Traverse all mortar joints using the detection coil
- Adjust sensitivity to refine anchor location
- Mark detected anchors (often with tape or chalk)
- Document density and spacing
Accuracy of the Method
Field validation has shown detection accuracy between 95% and 97% when compared to subsequent destructive testing.
False positives can occur due to:
- Metallic debris in cavities
- Downspouts, flashing, utilities
- Steel framing interference
- Metal lath from adjacent systems
- Foil-faced sheathing
When properly calibrated, however, the method provides reliable anchor mapping.
What Anchor Surveys Reveal
Non-destructive surveys allow engineers to analyze:
1. Anchor Density
Wall area per anchor compared to code requirements.
2. Distribution Patterns
Common findings include:
- High density above lintels
- Sparse anchors in wall fields
- Irregular placement in stone veneer
- Anchors not aligned vertically (possible sheathing attachment only)
3. Veneer Type Differences
In documented investigations:
- Brick veneer achieved ~94% of required anchors
- Stone veneer installed less than 60% of required anchors
Irregular stone coursing often complicates anchor placement.
These are conditions that cannot be seen from the exterior.
Destructive Veneer Anchor Evaluation
Non-destructive surveys locate anchors. They do not evaluate condition or attachment adequacy. That requires selective destructive investigation.
Minimally Invasive Methods
1. Borescope Inspection
- Small hole drilled into mortar joint
- Scope inserted into cavity
- Visual inspection and photographic documentation
Limitations: visual only, no structural testing.
2. Single Unit Removal
- Remove one brick or stone
- Inspect anchor embedment
- Confirm fastener location (framing vs. sheathing)
- Perform pull testing
This method allows confirmation of:
- Embedment depth
- Fastener type
- Corrosion state
- Proper orientation
It can also reveal installation defects such as anchors restraining vertical movement.
Large-Scale Veneer Removal
Where collapse risk is elevated or corrosion is widespread, larger removal areas may be required.
Non-destructive surveys still provide value by:
- Targeting removal areas
- Validating scanning accuracy
- Documenting pre-removal anchor mapping
The Hidden Threat: Wall Tie Corrosion
Veneer anchor corrosion is particularly dangerous because it develops within the cavity.
Observed conditions include:
- Complete cross-sectional loss of anchors
- Failure at fasteners
- Galvanized anchors deteriorating in under one year
- Collapse in non-coastal climates
Corrosion risk is influenced by:
- Moisture exposure
- Drainage and flashing performance
- Chloride exposure
- Acidic environments
- Material compatibility
- Maintenance practices
UK research from the Building Research Establishment (BRE) has extensively documented wall tie corrosion and replacement protocols, including BRE Digest 329 and 401.
Why This Matters for Owners and Engineers
Deficient veneer anchorage can result in:
- Sudden facade collapse
- Pedestrian injury
- School and public building hazards
- Litigation exposure
- Costly emergency stabilization
Because the anchorage is concealed, problems typically remain undetected until cracking, displacement, or failure occurs.
Proactive investigation is significantly less expensive than reactive repair after collapse.
Recommended Evaluation Strategy
For buildings with suspected veneer attachment concerns:
- Perform non-destructive anchor mapping
- Analyze density and spacing against code requirements
- Identify irregular or suspicious areas
- Conduct targeted destructive testing
- Evaluate anchor material and corrosion condition
- Develop repair or stabilization plan
A hybrid methodology provides the most reliable assessment while minimizing invasiveness.
Key Takeaways
- Masonry veneer failures are often sudden and preventable
- Anchor deficiencies are concealed within cavity walls
- Non-destructive surveys are highly accurate (95–97%)
- Stone veneer often shows lower anchor density than brick
- Corrosion can occur early—even in non-coastal climates
- Combining survey and targeted destructive testing is best practice
Hidden does not mean harmless.
Proactive investigation of masonry veneer anchorage can prevent catastrophic facade failures and protect public safety.
For further reading
Boom lift risks in masonry restoration
Multi-wythe masonry stabilization
Masonry facade failure case studies
References
International Code Council (IBC)
https://www.iccsafe.org
The Masonry Society (TMS 402/602)
https://masonrysociety.org
Brick Industry Association – Technical Notes 44B
https://www.gobrick.com
Building Research Establishment (BRE)
https://www.bregroup.com